
100 Day Challenge [Days 41-50]
Day 50 – the half way point of the challenge!
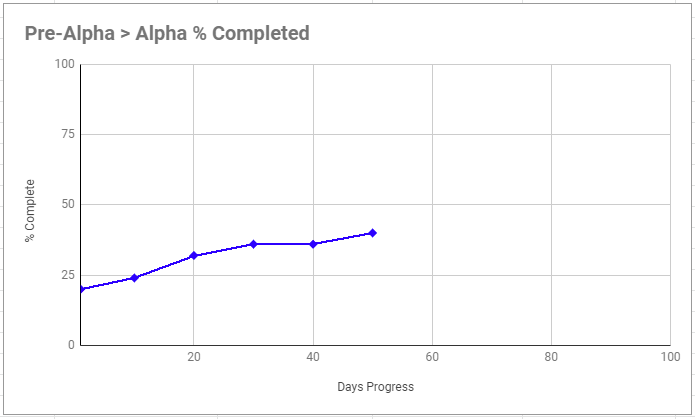
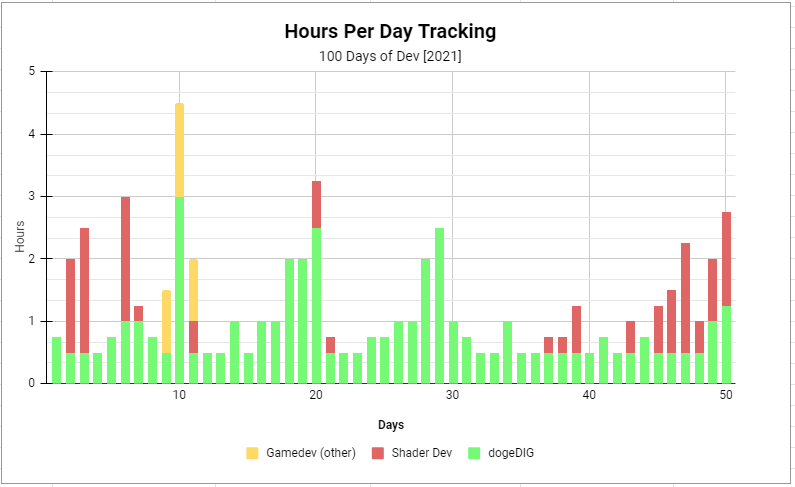
Total dev time: 62h 30mins
dogeDIG:
This took longer than I hoped, but the voxel digging system is finally at a point where it works again and is now connected to the doge/player character!
After many weeks of refactoring code and redesigning parts of this system its good to see it working well, another task ticked off the Alpha checklist.
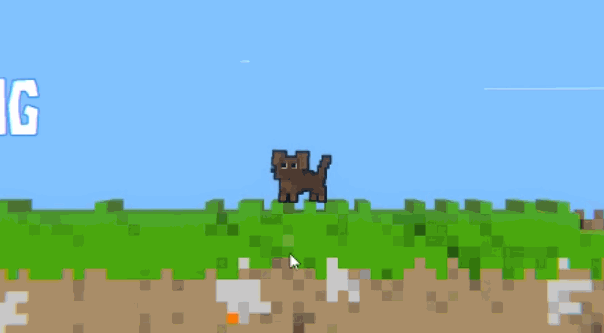
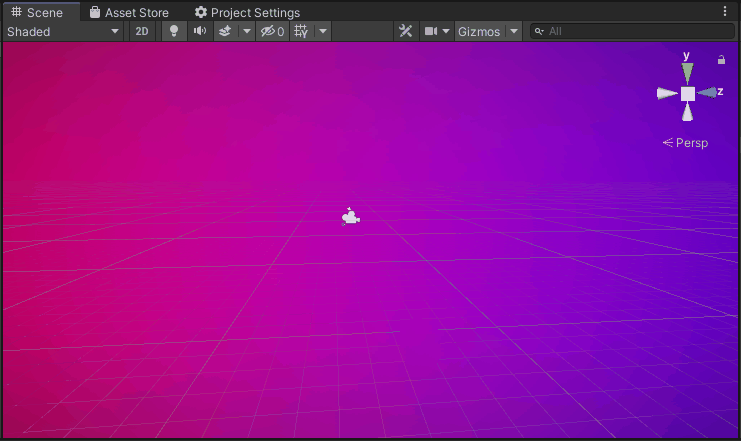
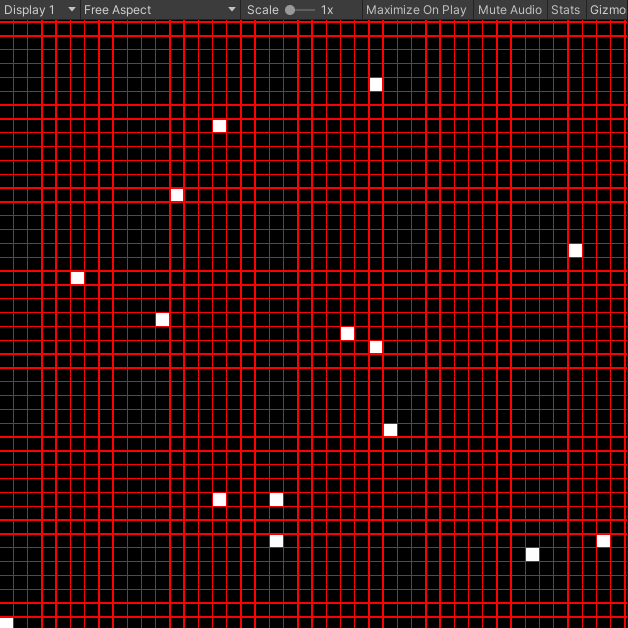
Digging before refactor:
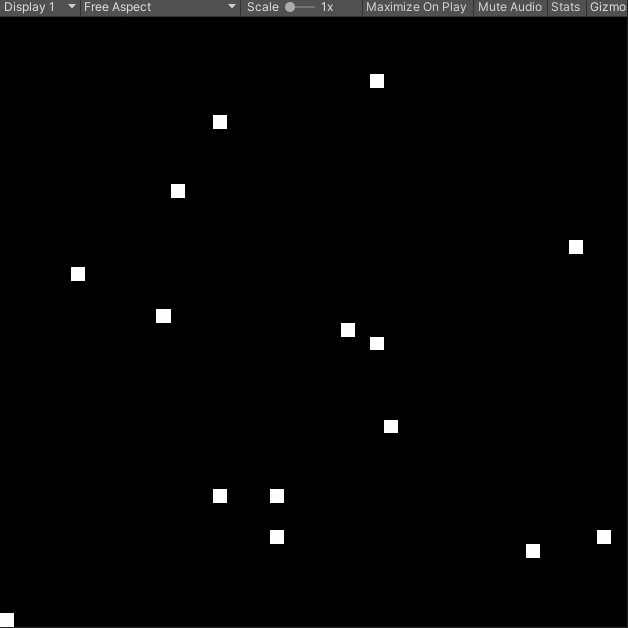
Digging after refactor:
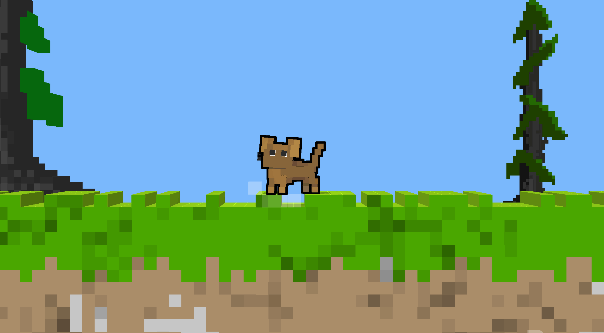
The first thing youll likely notice is that it looks almost exactly the same 😅 But thats the point! All of the work Ive put into this system towards the end of this year have been for internal improvements, aimed at making the system far more efficient and easier to add new features and improvements to. And thats what I’ll get to later this challenge and once the game is in Alpha… a whole lot of new features soon to come (starting with biome support!)
Some things are missing from the old system still though, from proper colouring of voxels being dug up to the difficulty of digging through different types of block. Before you would tear through grass and dirt but get stuck on rocks (which took a while to dig through), that is something I’ll need to add back in soon as well. Gold also needs to be reimplemented (during the following 10 days!)
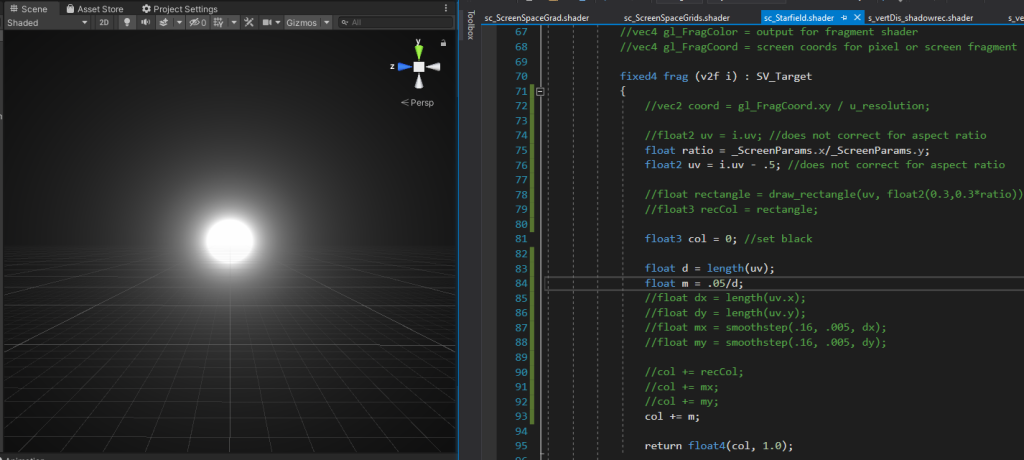
Shader Dev:
Feeling a bit more confident with shaders now, this 10 days I wanted to put together a star-field shader, for a pixel art night sky (likely an element of a sky shader to be used for dogeDIG once theres a day/night cycle)
I found some good star shaders for references online, stumbling across the Shadertoy site which Ive seen many times in the past. But the issue is that these shaders are in pure GLSL, whereas Unity uses HLSL (similar but different). Knowing these languages are very similar and after some poking around I discovered how to translate Shadertoy shaders to Unity! (huge thanks to The Art of Code for this great tutorial on the topic. Theres still some tricky bits of conversion I havent been able to work out for some shaders, so it doesnt work for everything, but this does mean I’m able to mess around with a huge repository of shaders for my Unity-based games.
This shader below is a very simple rainbow-UV shader, the default shader on Shadertoy – but I managed to convert it to HLSL and get it running in Unity which was a bit of a eureka moment – knowing I can now learn from the shaders on Shadertoy!
So the steps I went through to make my own starfield shader were as follows:
- I Started out trying to make a simple circular star effect, but decided right away I definely wanted to have pixel-stars so this false-start was quickly binned
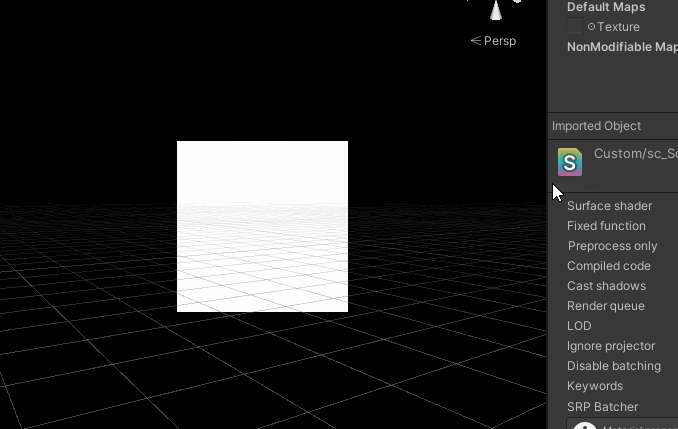
2. Draw a square? (simple enough) – or at least this step should have been simple enough. Took me a few attempts to get this correct and to draw a square I could control the size and position of, I think at this point I still lack some fundamental knowledge of shaders (note to self – go over intro tutorials properly). But of course Im stubborn so I kept with the ‘make it up as you go’ approach which eventually lead to a HLSL-function where I could draw a square of a certain size in a given postion on-screen.
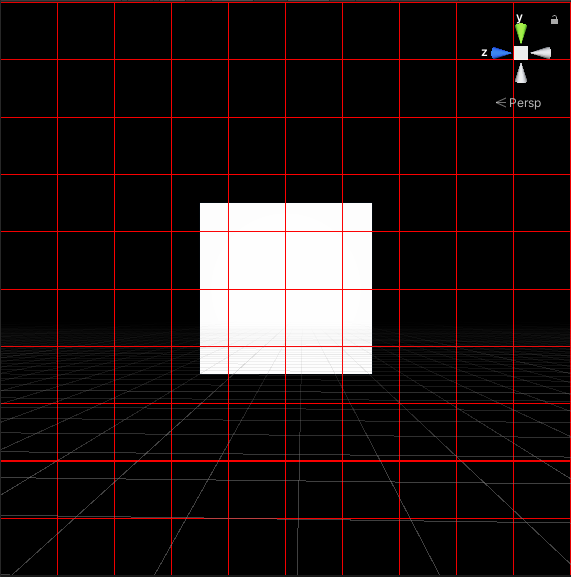
3. Divide the uv/screenspace up into a grid. The idea I had here was to populate the grid spaces randomly with stars. This is where The Art of Code’s tutorials on youtube were handy, he seems to be a big fan of working with grids, so I went with that idea here.
4. Generate a unique ID for every grid space, then using that ID and a random number generator determine if a star should be drawn. Use the square function to draw a star in the spaces which should contain a star.
5. Make a function to draw a layer of grid-stars (which can be scaled to different sizes), then make multiple layers of these stars at varying scales and with offset from one another (to avoid any pattern repeating) – I added in bloom/effects at this point as well, to make them glow a little.

6. At this point its looking like a nice starfield, but I wasnt 100% satisfied with it because it was lacking any movement/life. So I added in a sparkle element to the star drawing function, which randomly flickers the stars on each layer. Making the ones far off sparkle faster than the closer ones really made the whole effect come together.
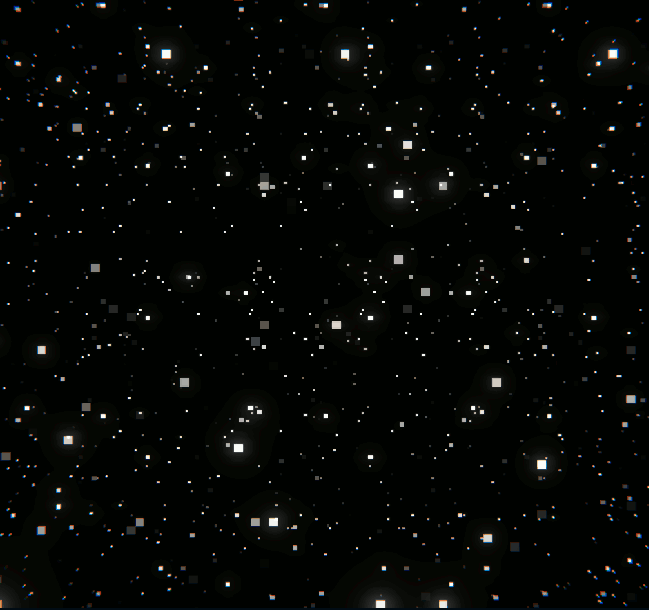
Certainly happy with the end result of this shader!
I also discovered The Art of Code’s raindrop shader tutorial, which I watched throughout making this starfield shader. I liked that effect enough I decided I’d make the raindrop window shader in the next 10 days.
Final stats for this 10 days:
/end